
Blog
The boy who dreamed of being Kimura.
Ago
Hello, bonsai family!
We’re not going to bore you with a long story, but to put things in context, who hasn’t heard of Masahiko Kimura’s incredible creations and wished they could create something similar? Well, that’s what this post is about, but above all, let’s try to have fun.
Let’s do a “Kimurada”:
As inspiration, we have compiled a medley of ideas from the master and then merged them into one that has a bit of his essence while still being different.
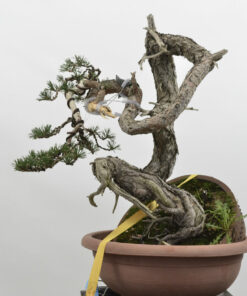
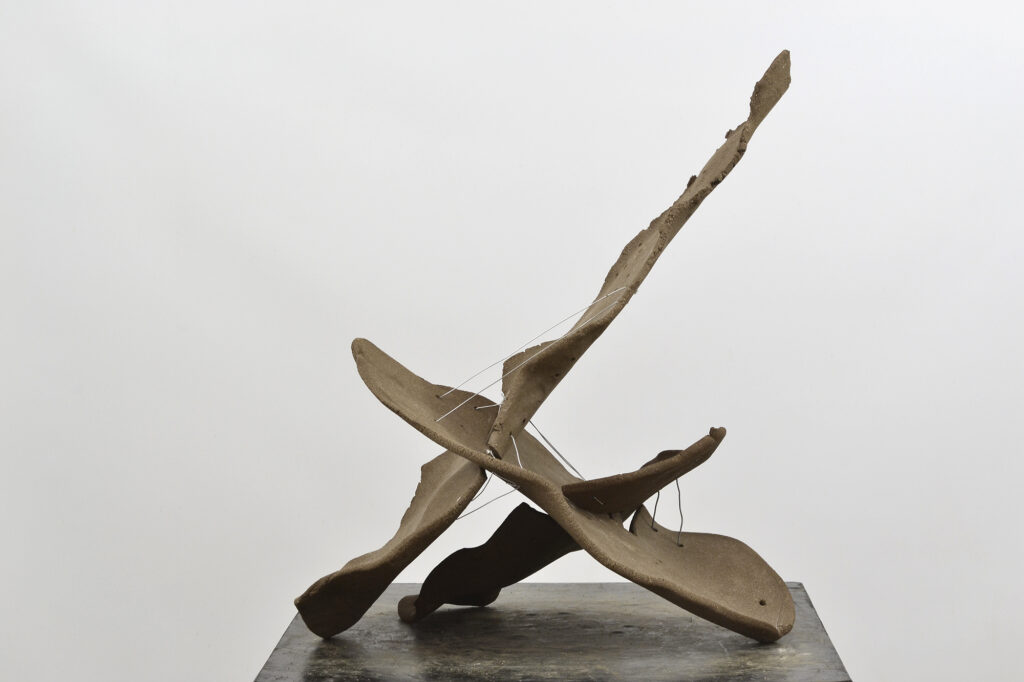
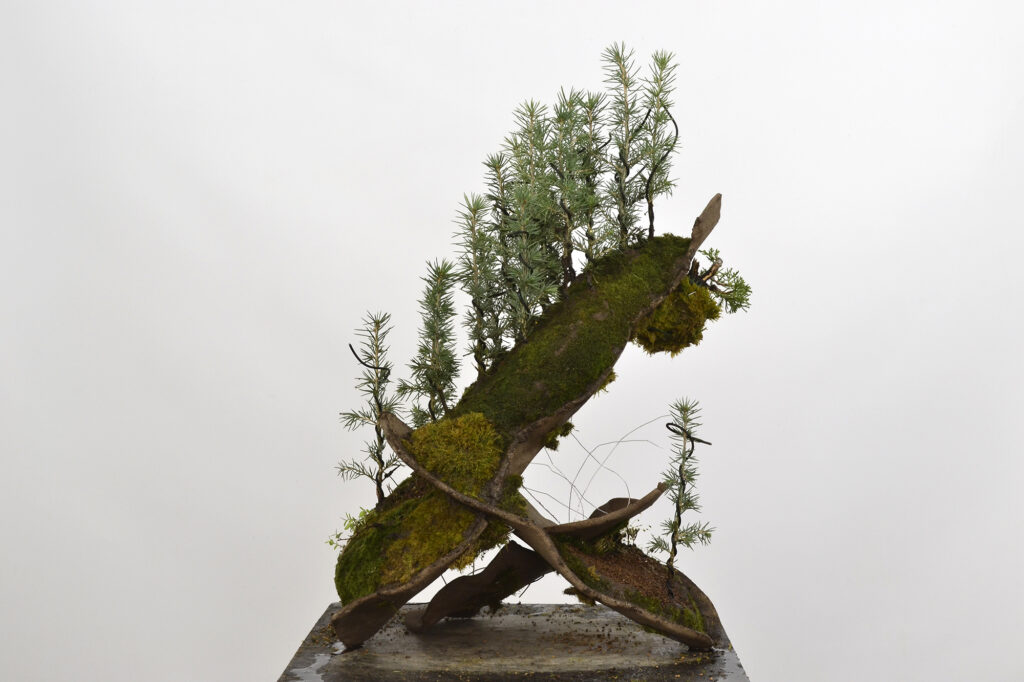
There is a creation by Kimura in which he joins two natural kuramas by cutting them and forming a vertical landscape with hinokis. That is the idea, but we will do it with three pieces to have three points of support that give stability to the whole. So we prepare the ceramic slabs. And there they are before assembly.
You can use natural stone. Slate slabs will come to mind. They are easy to find in different thicknesses and with natural-looking edges. However, they are not recommended for cold climates, as they tend to crack due to expansion and are also prone to breaking when worked.
We secure them with galvanised wire so that they do not move. Now we will use the holes we made in the pieces to insert anchor wires to secure the trees.
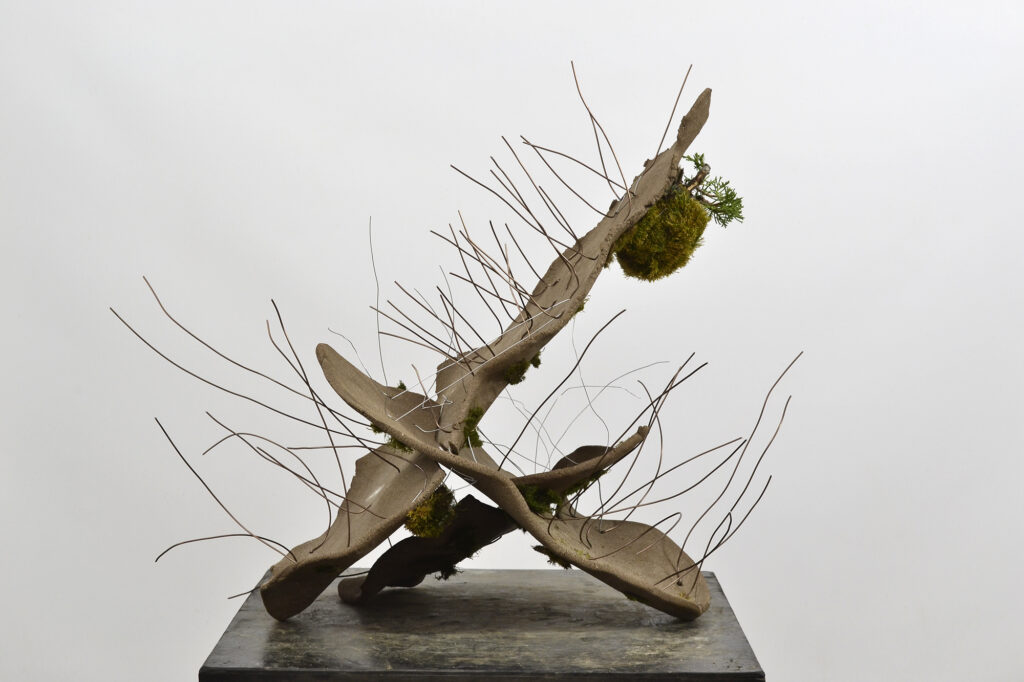
You can see that we have already placed a small itoigawa at the top that will fall over the cliff. To hold it in place, we have made a pot with plastic mesh, which we use to cover the drainage holes in the pots.
Isn’t it fun? We haven’t done much, but it already looks great.
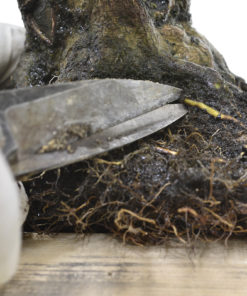
As a trick, when placing the anchor wires, some of them will be visible. So, before attaching them to the piece, we have inserted some pieces of climbing moss that stays green even when dry and clings happily to the stone.
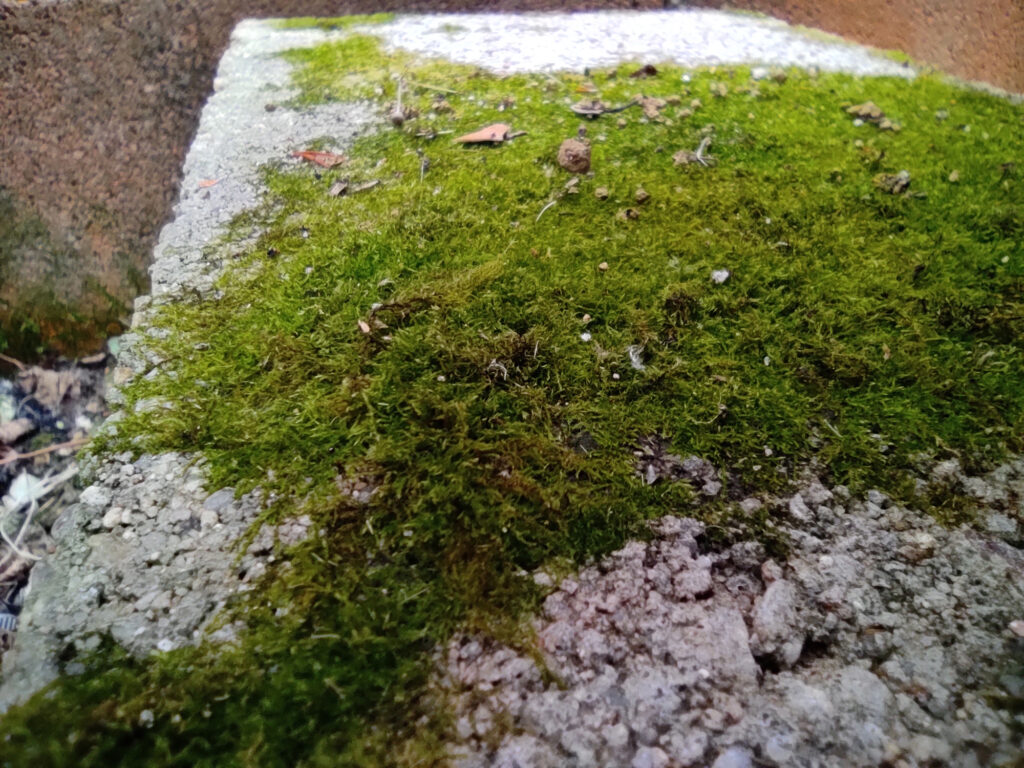
This moss grows on rocks in areas of high humidity and is the first form of life to appear on inert stone. Its strands can grow quite long and tall (for moss, that is) and then give rise to other types of moss and seeds from different plants begin to germinate as fertile soil is created. The example in the image is the one we have used for our planting. It grows on the blocks of the shelves and, if it does so on vertical surfaces, it is practically thin, around a millimetre high, and feels like tissue paper, more or less. Another place where it can be found is on the trunks of azaleas, as it likes acidity and grows naturally at the base and then begins to climb. It is easily recognisable because it does not come off in pieces, like other mosses, which break into small pieces. This one can be removed from the trunk by pulling carefully, and it comes off like when you peel a sticker off a piece of paper. It is more difficult to remove from the trunks of holm oaks, pines and nirekeyaki elms. But it must be removed, otherwise we will lose the bark of our bonsais!
Sigamos tras este paréntesis.
Remember not to use keto on its own. It needs to be mixed to facilitate hydration if it dries out too much because, once dry, it never rehydrates.
Well, never, never… we’re exaggerating, you might think. Well, no. It stays like a rock and is no longer mouldable or completely hydrated. To give you an idea: it’s like putting cement on it. And we’re going to cover the entire substrate with it, so we can’t mess around.
The normal thing to do is to mix it with fine-grained akadama. What’s left between the steps to remove the dust and the next number, which is usually about 2 mm. Some people discard this grain, while others use it for shohines, mames or accent plants. In this case, we mix it with that grain size of akadama and also with sphagnum moss without sifting or cutting the strands.
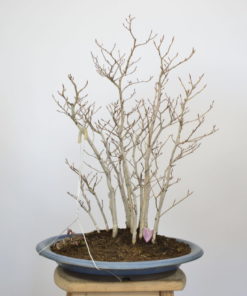
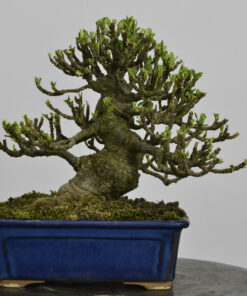
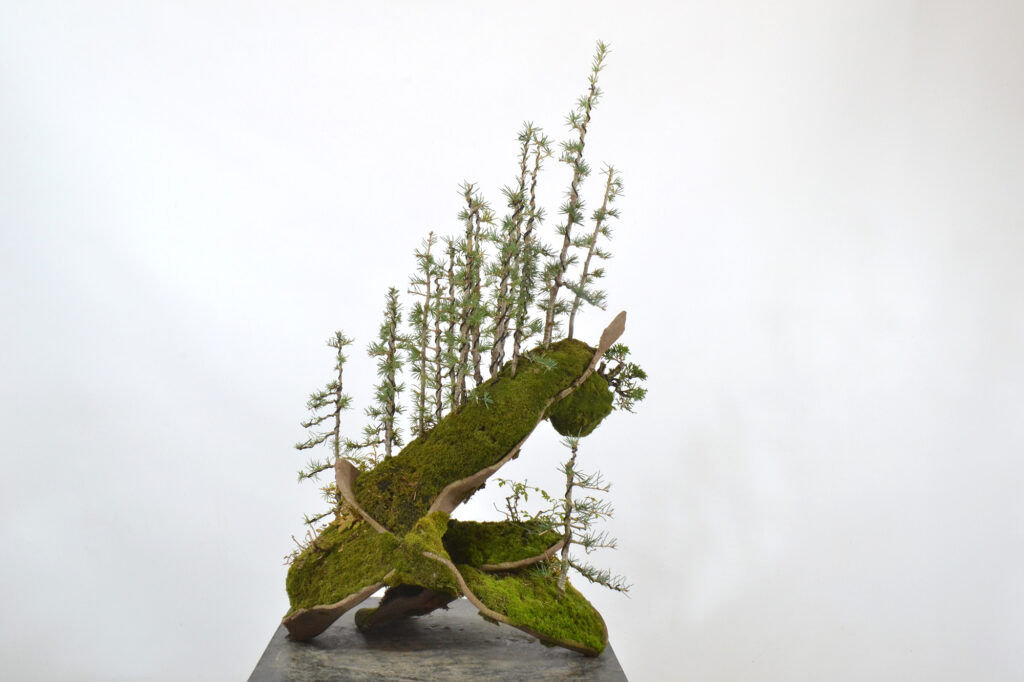
As the main tree, we chose seedlings in forest cells of Cedrus atlantica, known to us as the Atlas ‘Pig’. XD
On the left side, we have planted a Lonicera nitida and some Woodsia macrochlaena, and on the right side, also Woodsia macrochlaena. These ferns are shaded by the slabs.
The central space still needs to be completed. There we will plant a dwarf rose bush, a cotoneaster and a maidenhair fern.
Now we just have to cultivate correctly and monitor the support wires. We will prune if necessary, of course. The cedars should not suffer from transplant shock since the entire root balls from the seed trays have been used, except for the specimen on the right.
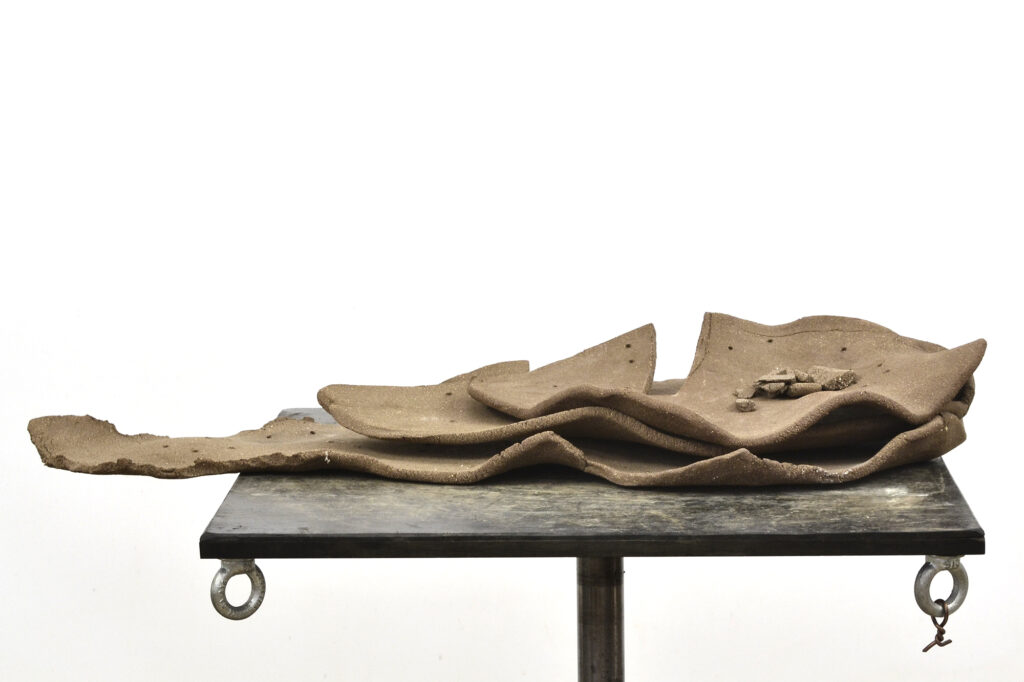
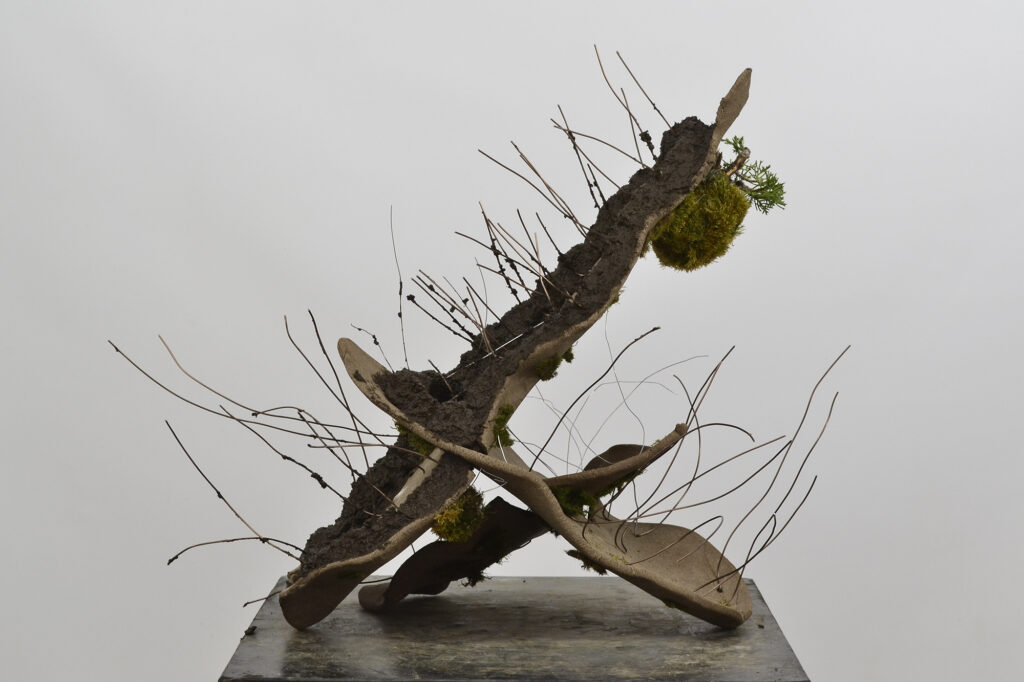
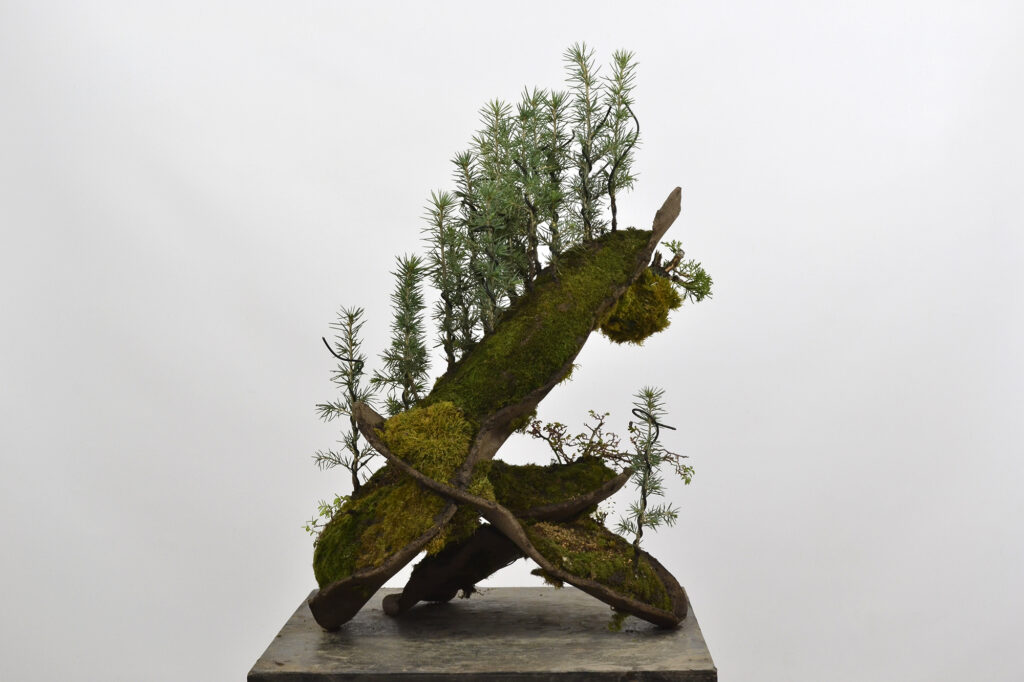
Time passed, and in 2025 it arrived like this:
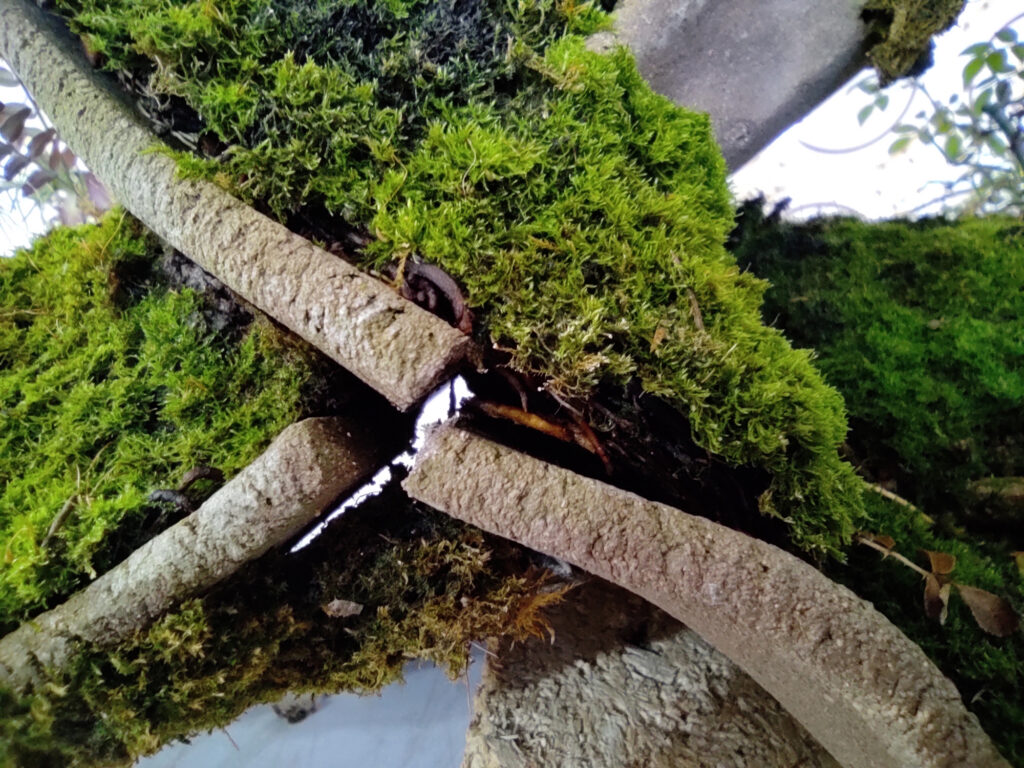
Como es evidente, debimos calcular las fuerzas que iban a ejercer las piezas de cerámica según el barro, la altura, etc…Bueno, era un divertimento y de los errores se aprende.
Vamos a intentar repararlo y si no funciona el invento, habrá que buscar una solución viable para no perder el trabajo de creación de este paisaje que tantas alegrías nos estaba dando.Obviously, we should have calculated the forces that the ceramic pieces would exert based on the clay, height, etc. Well, it was fun, and we learn from our mistakes.
We are going to try to repair it, and if the invention does not work, we will have to find a viable solution so as not to lose the work we put into creating this landscape that was bringing us so much joy.
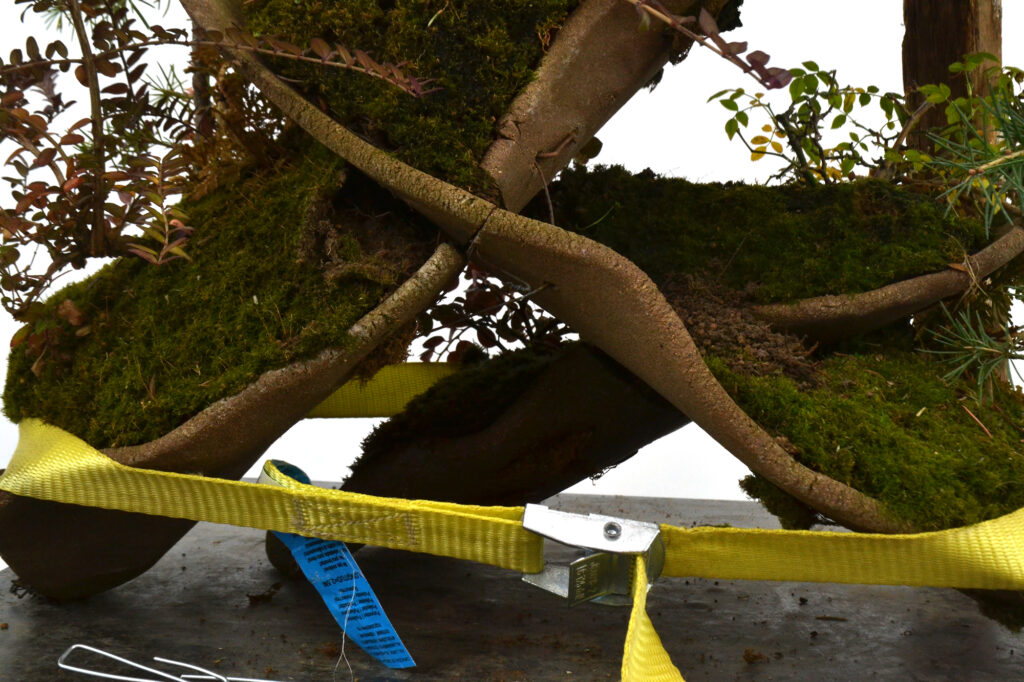

Yes, we’ll do something else, you’re right. We’ll use chemical anchors to secure the pieces by placing a wire “beam” frame.
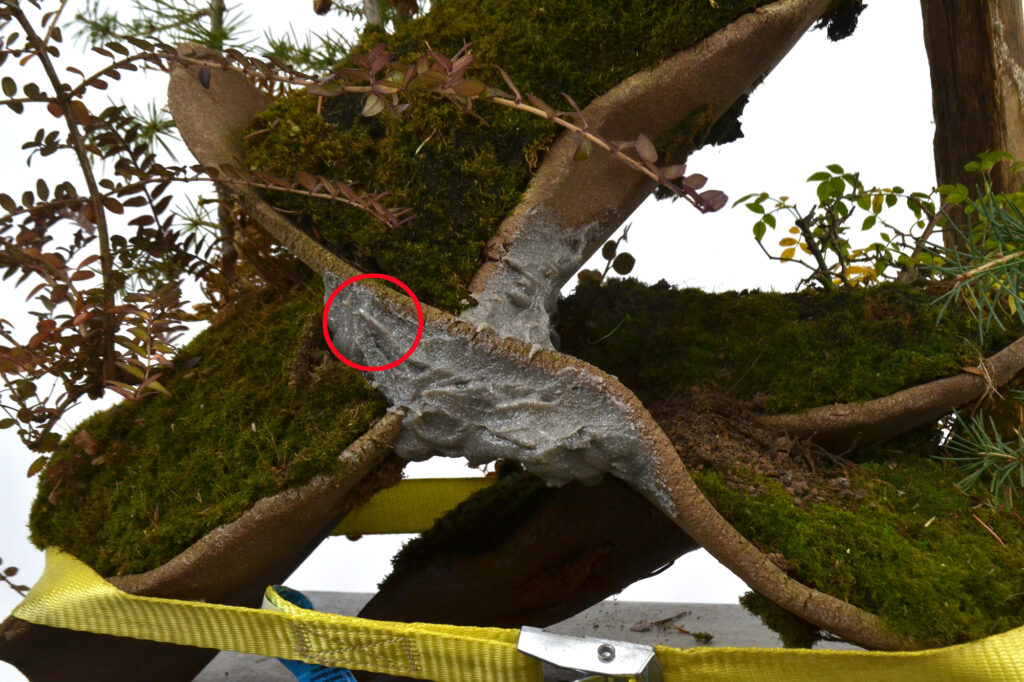
This piece was broken, and after applying the chemical plug, it was perfectly secured. However, since we are already working on it, we will also apply it to the other joint to prevent it from moving and breaking. Hopefully, this will be a permanent solution, and in a few years, we will be able to show off the repair.
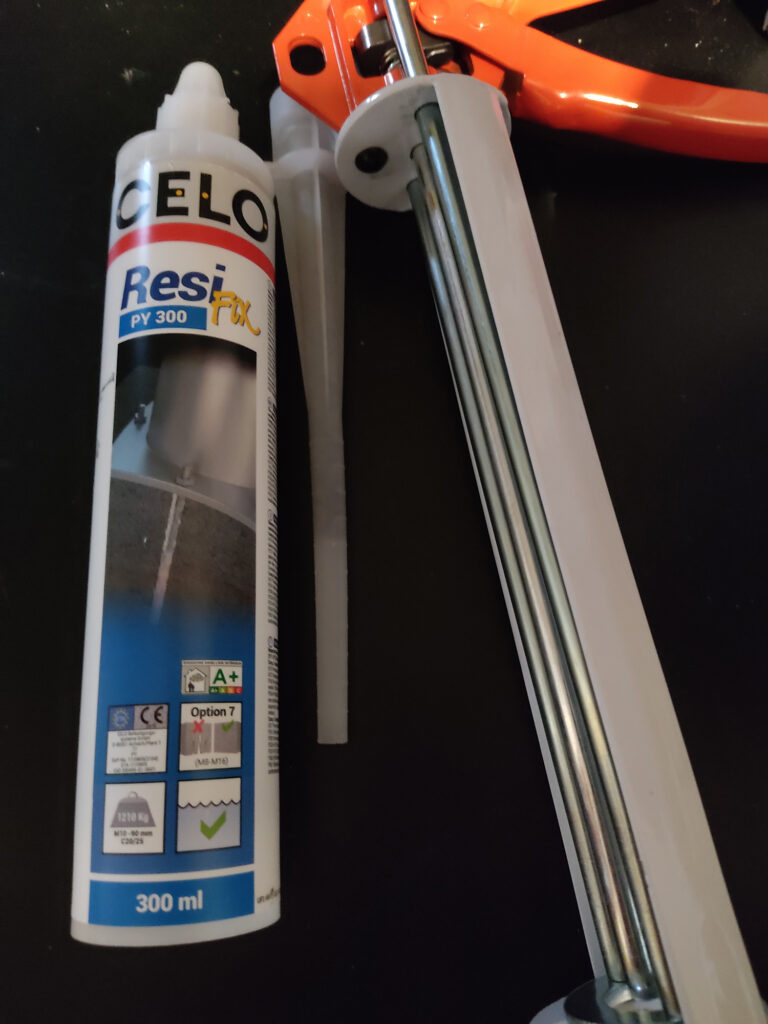
There were not many options available in local shops, and we chose this one because of its moisture resistance.
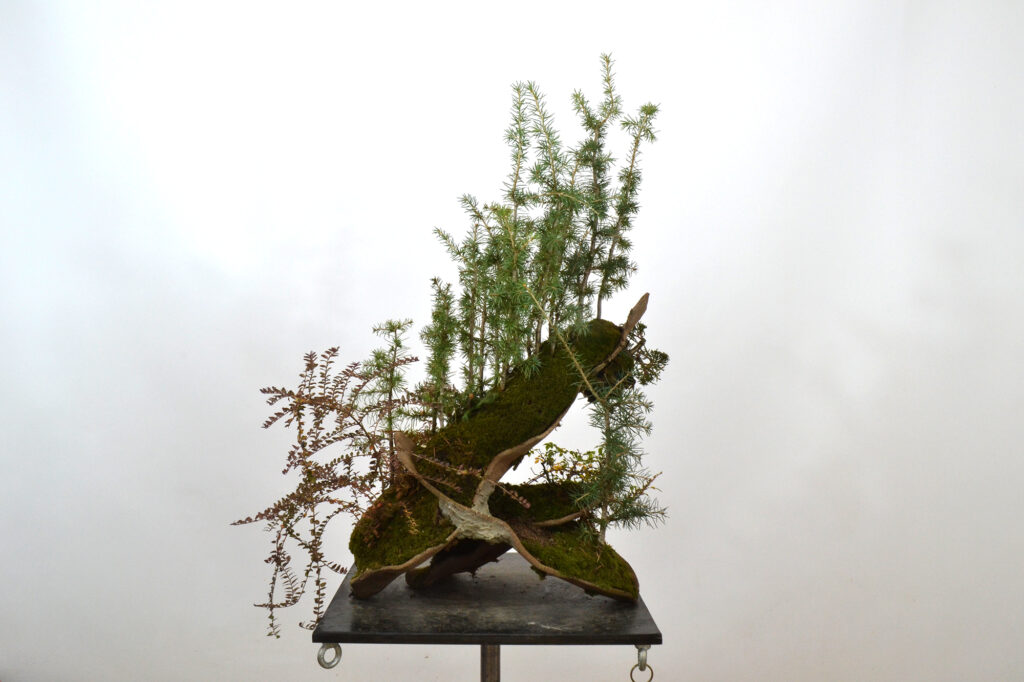
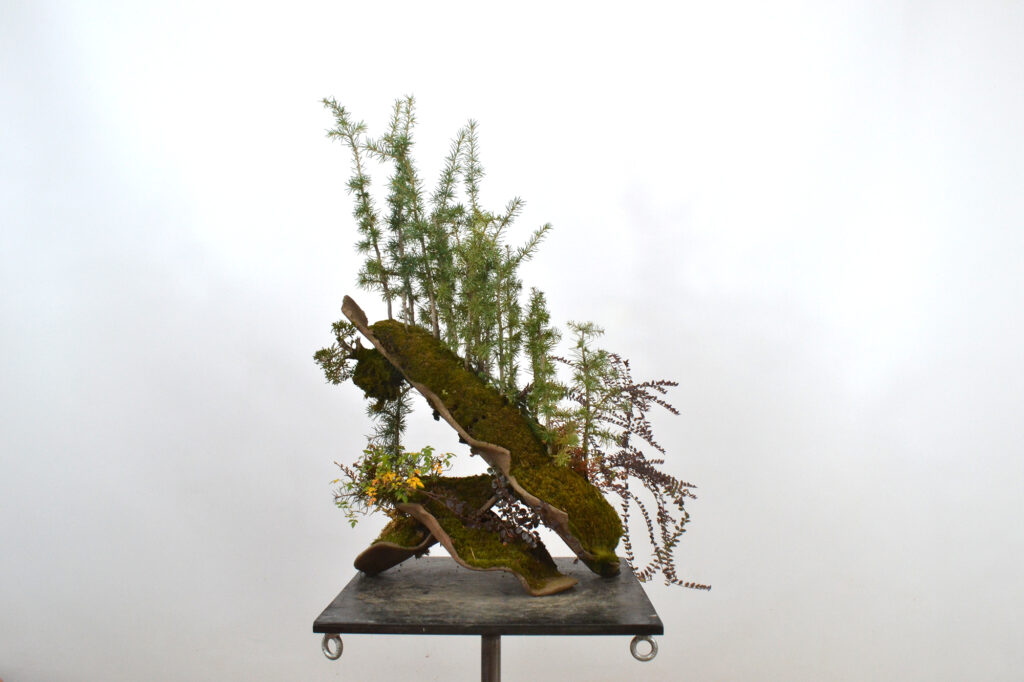
Here we see the rose bush on the left, the cotoneaster in the centre and the honeysuckle on the right with its purple leaves from the cold.
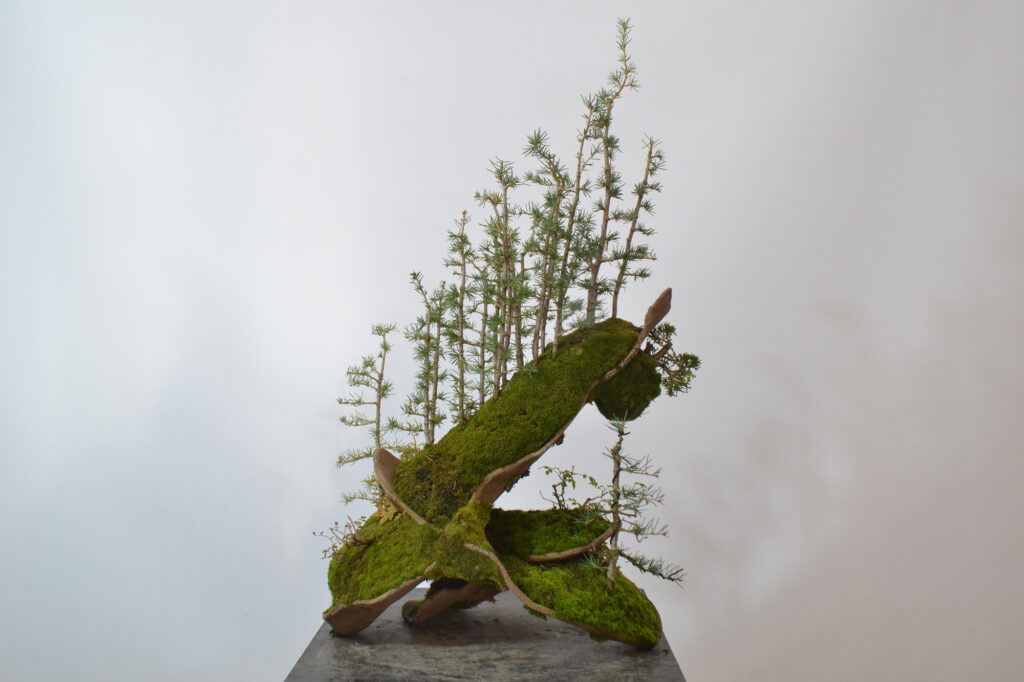
What happened here?
Someone must have noticed that the repair isn’t visible…
Let’s rewind a little. Wiiiiiiiiiiiiiiiiuuuuuuuuuuuu!
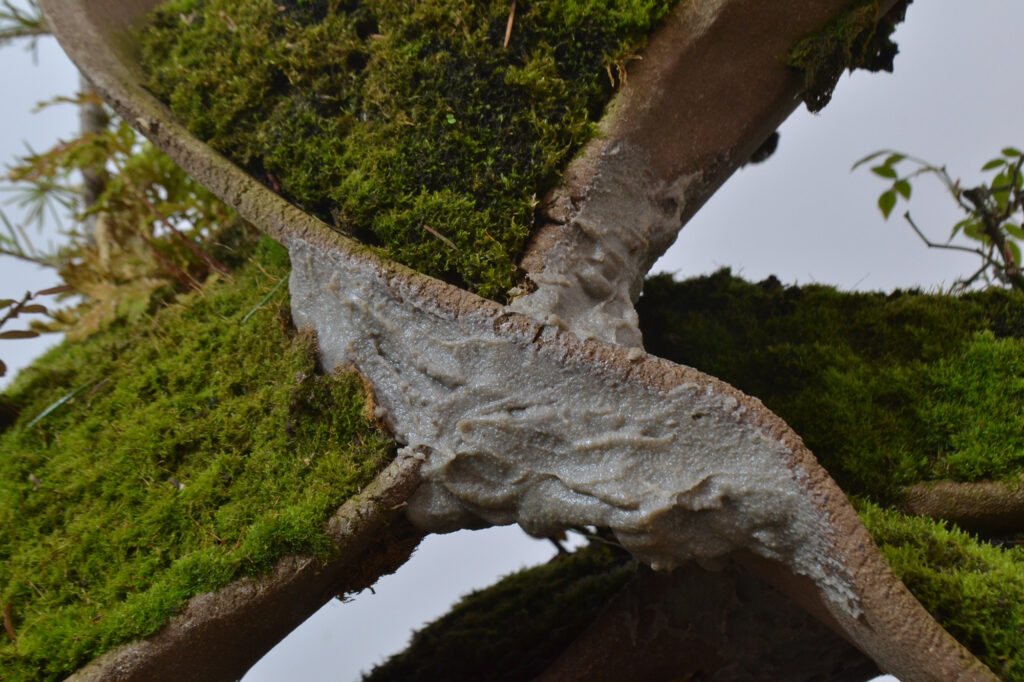
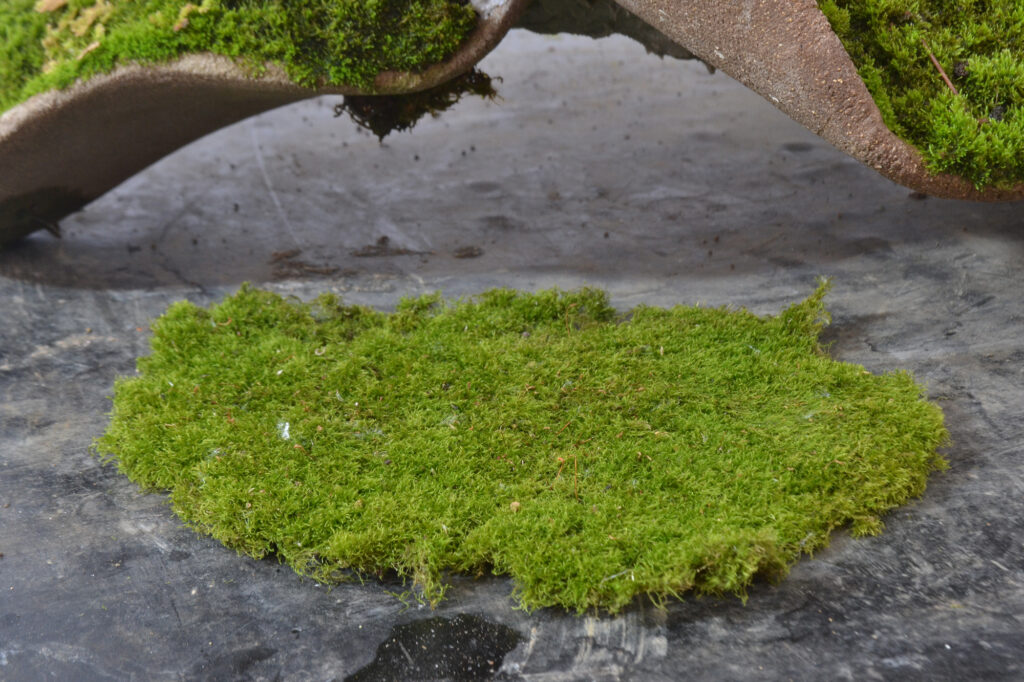
We are going to show you the ‘almendiuco trick’. How to fix moss so that it does not fall off. We can use glue, but of course, what glue will not burn our moss? There are some very good materials, but some react with certain materials. For example, cyanoacrylate, when it comes into contact with human hair, dissolves it, burns it. So…
We know that it does not damage plants. It is greyish green when wet and dark green when dry, at which point it becomes considerably hard for a material that must be removed once it has fulfilled its function of sealing and fixing the grafts.
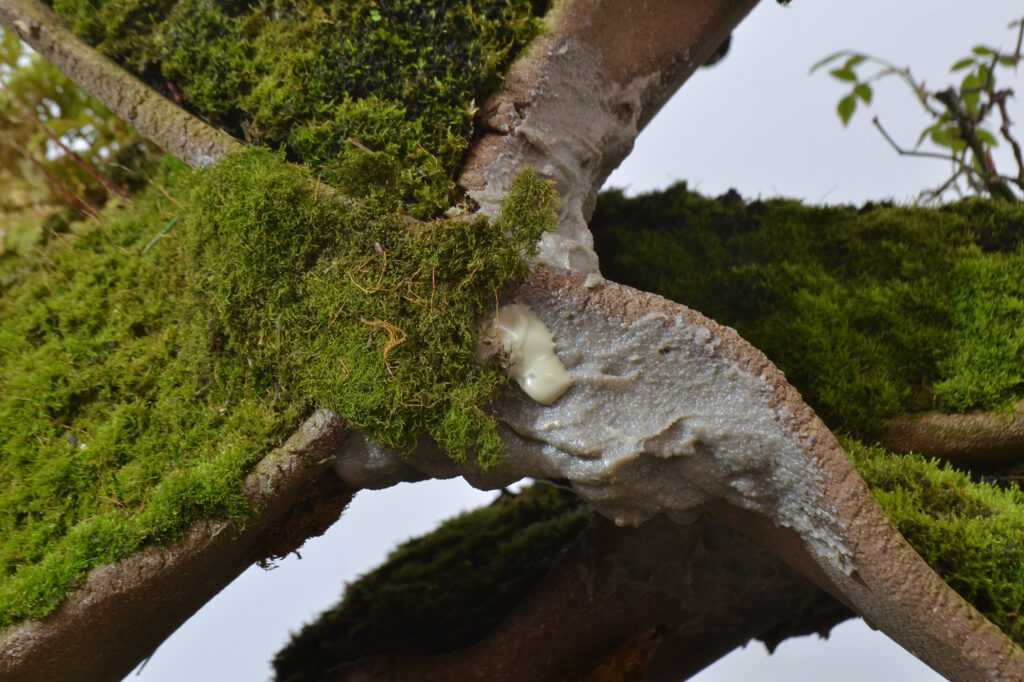
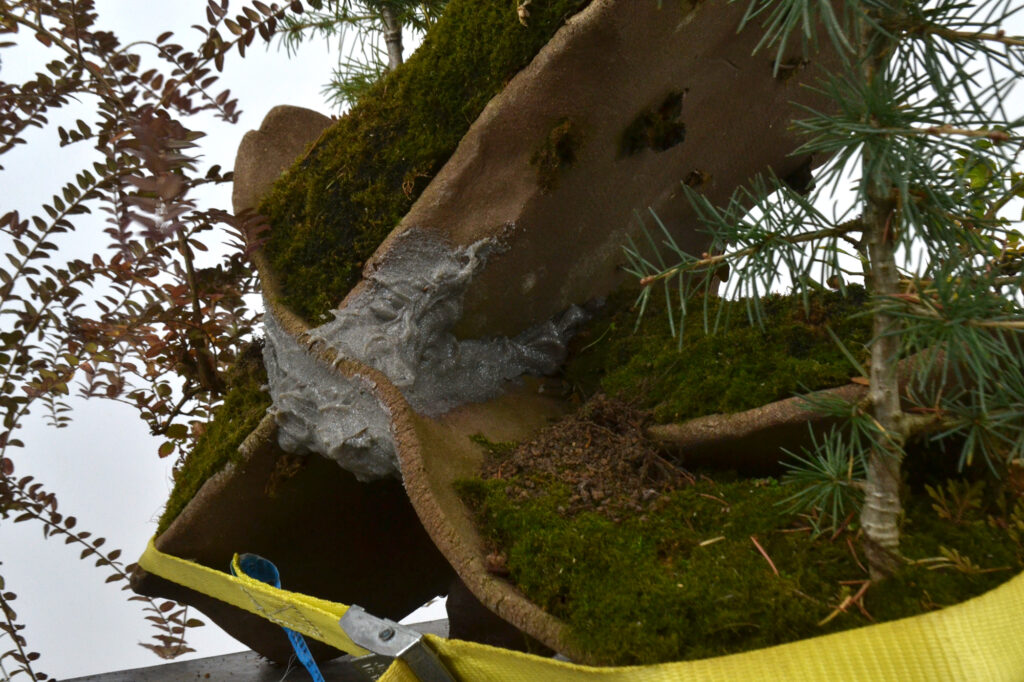
The mechanics of the invention are clearly visible. However, to be more precise in the application of the sealer/fixer, it is better to do it by ‘trial and error’.
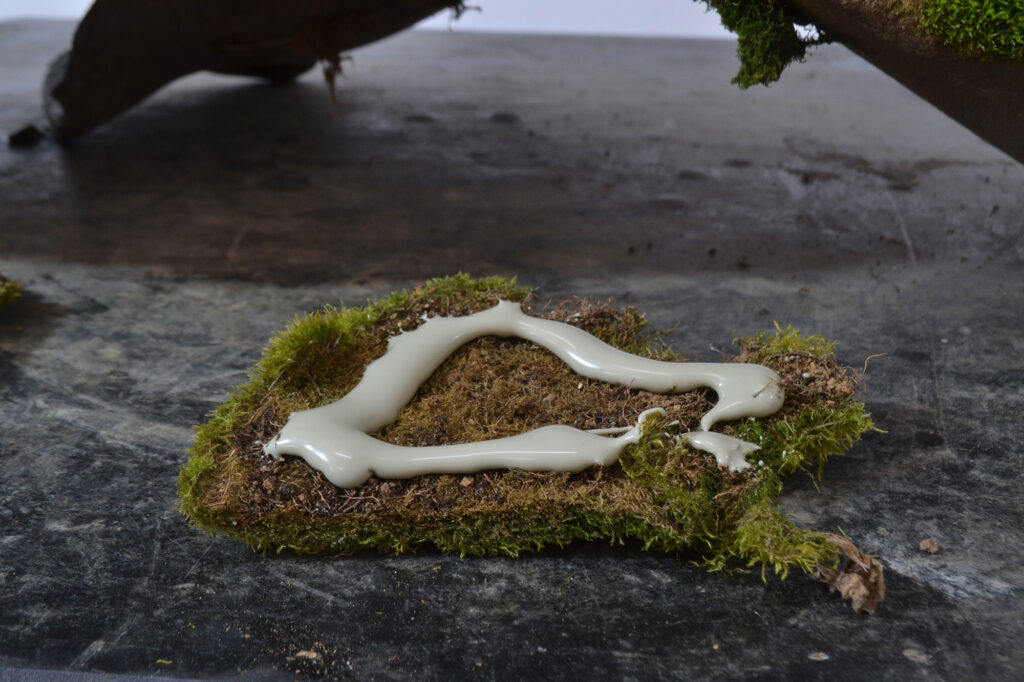
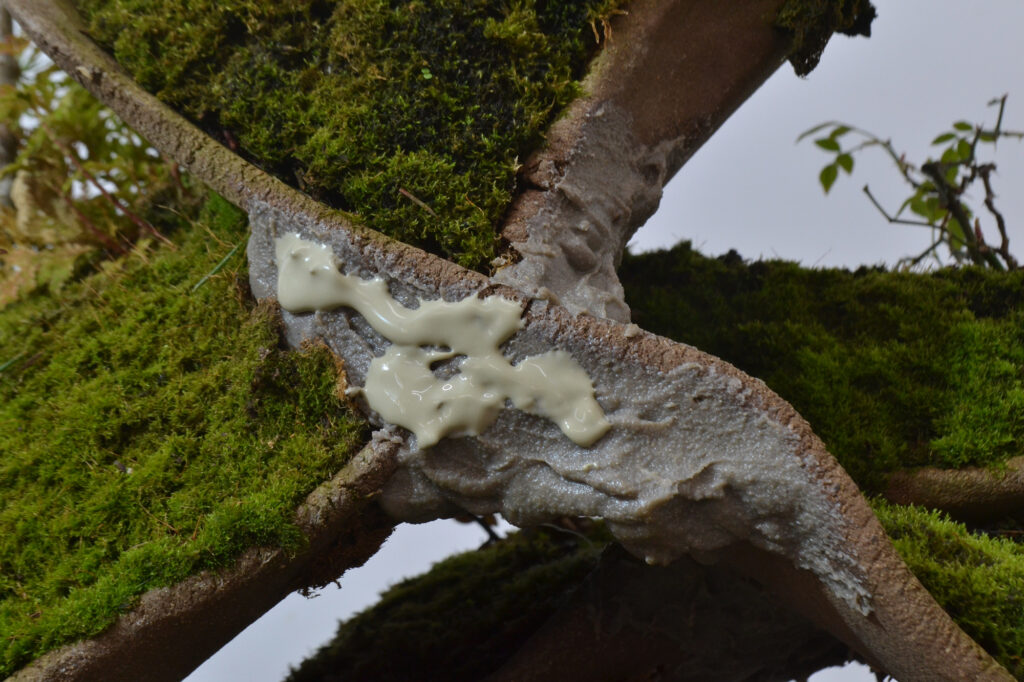
We put it in place, moving it around a little bit so that it spreads out a little better.
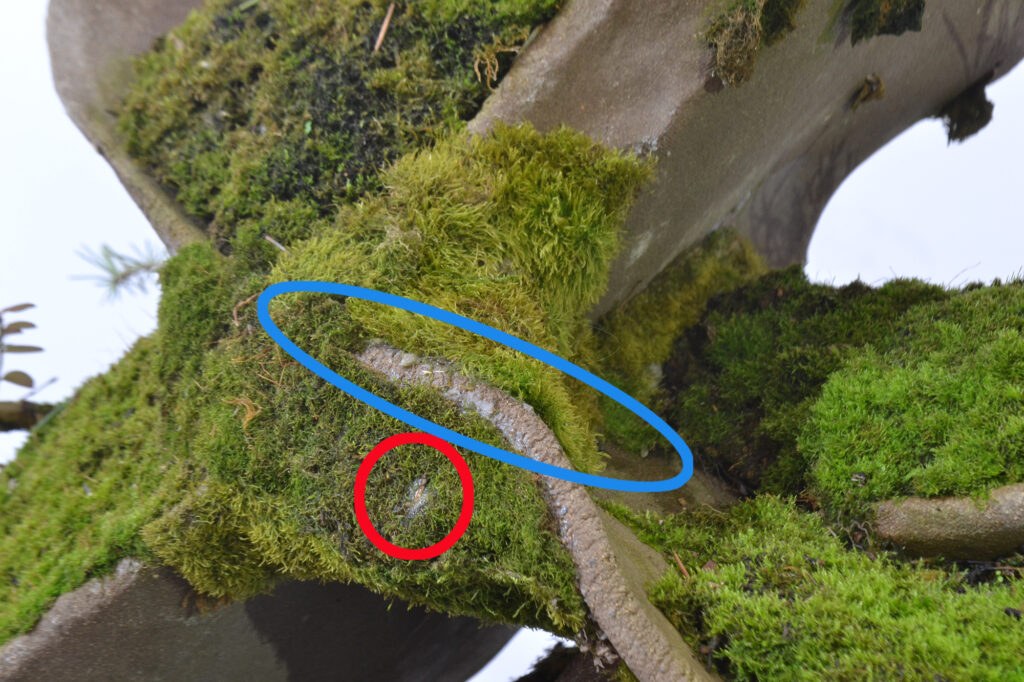
In the red circle, you can see a little sealant that has penetrated the thin layer of moss and is now visible because it is still damp and retains its greyish colour. Once it dries, it will not be noticeable and, in a short time, the moss will have covered it. In the area marked in blue, you can see the chemical plug. We could have covered it with moss, but it will not be exposed anywhere, and soon, the growth will conceal what is now evident when viewed up close. From a distance, it is practically invisible.
We hope you enjoyed this article and that it helps you as much as possible with your bonsai trees. And why not? We hope it encourages you to undertake fun projects like this one, in which you can use modest materials such as these forest seedling trays or pre-bonsai trees with a little more training, or, of course, high-quality bonsai trees. Give free rein to your imagination and enjoy bonsai, as the saying goes: let’s enjoy it while we can.
Best regards and see you in the next post.
David.
Y, si quieres aprender con nosotros, ¡ven y apúntate!
-
 Taller Monográfico de Creación de bosques. Sábado 14 de noviembre de 2026.100,00€ IVA incluido
 -
Taller monográfico de noviembre. Sábado 28 de noviembre de 2026.100,00€ IVA incluido
-
Taller de bonsái. Sábado 19 de diciembre de 2026.100,00€ IVA incluido
-
Taller monográfico de diseño avanzado 2026. Sábado 17 de enero.100,00€ IVA incluido
-
Taller de Bonsái. Sábado 14 de febrero de 2026.100,00€ IVA incluido
-
2º Taller monográfico de trasplantes. Domingo 8 de marzo de 2026100,00€ IVA incluido
-
Curso Intermedio. Sábado 17 de octubre de 202690,00€ IVA incluido
-
Curso de iniciación al bonsái. Sábado 12 de diciembre de 202650,00€ IVA incluido
-
Taller de Bonsái. Sábado 18 de abril de 2026.100,00€ IVA incluido